


Welcome To My World
Here are more photos I took on my first visit to the Museum Collection Centre on 17/09/22.
This sign hung on the HP Sauce factory in Aston, Birmingham until the building closed down in 2007 and was demolished.
Read about HP Sauce here.
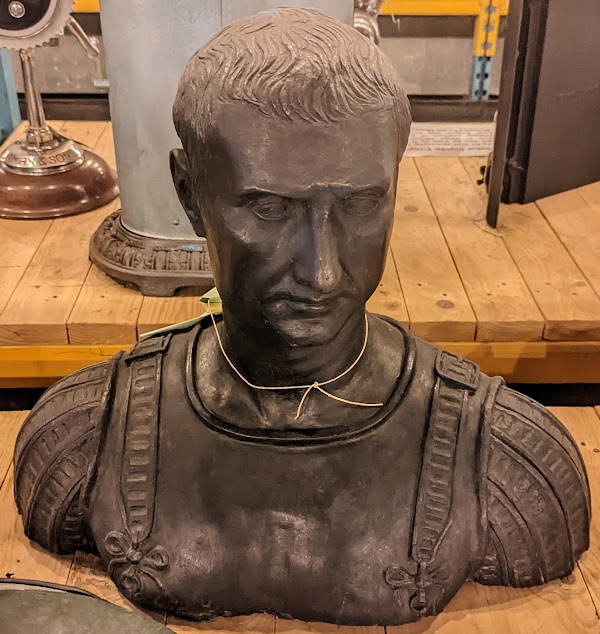
Vitellius was the Roman emperor from the 19th of April AD to the 20th of December AD 69 following the quick succession of the previous emperors Galba and Otho, in a year of civil war known as the year of the Four Emperors.
Read about Vitellius here.
Read about Roman Emperors here.
Read about the Roman Army here.
Read about the Roman Empire here.
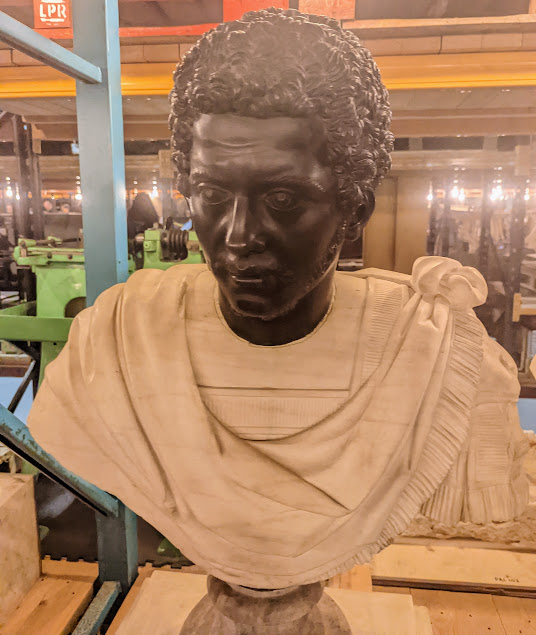
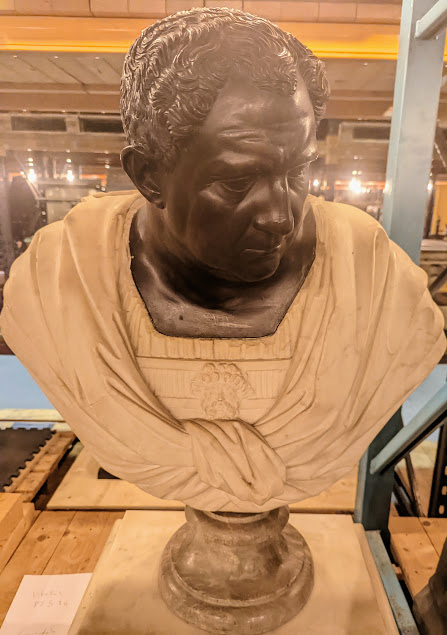
This Bronze sculpture from the 15th/16th Century, Florentine, Italy, is of an unknown man in Roman armour. The Roman Empire wore standardised dress and armour, but this was not part of their culture and there were many differences in detail. Surviving fragments of clothing suggest the basic tunic of the Roman soldier was red or undyed wool. Senior Roman soldiers wore white cloaks and feathered plumes.
Read about the Roman Army here.
Read about the Roman Empire here.
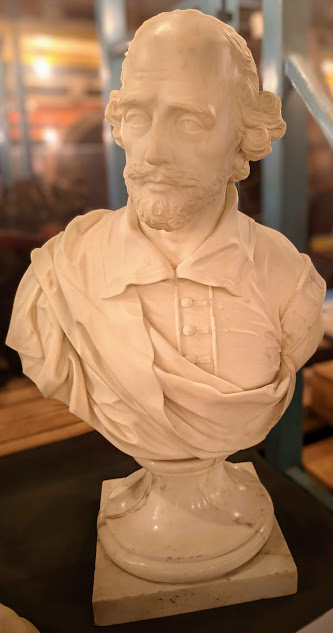
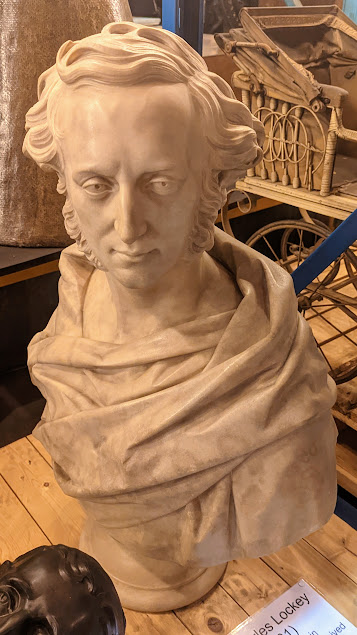
Lockey was the tenor soloist in Mendelssohn’s Elijah which received its premiere at Birmingham Town Hall in 1846.
Read about Lockey here.
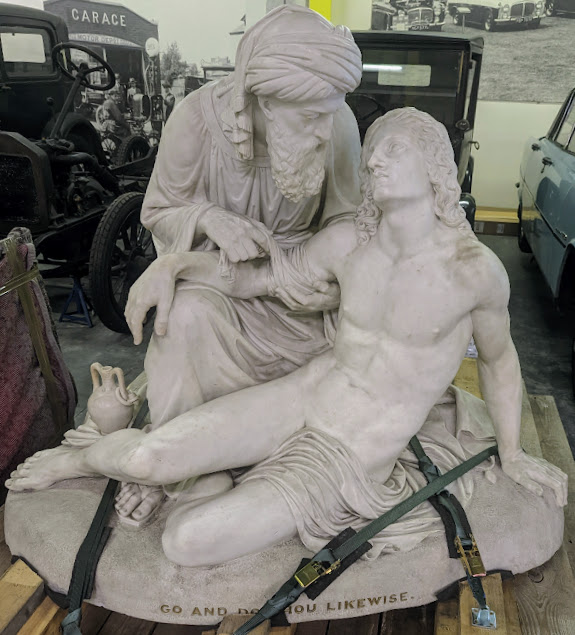
This statue was placed in the front entrance hall of Cheltenham General Hospital in 1853, as the result of the exertions of Charles Fowler Esq., the senior surgeon of the Hospital at the time and public subscription. The commission was awarded to the sculptor, Holm Cardwell, who was born in Manchester in 1820 and studied in Paris and in London, before making his permanent home in Italy.
The two figures were sculpted from a single piece of Italian white marble and depict the Good Samaritan tending to the man who had fallen amongst thieves. The statue remained in the front hall of the hospital on a large plinth until the late 1960’s; the redevelopment of that part of the hospital to provide more space for patients facilities resulted in its removal from the hospital and it was presented to the Birmingham Museum and Art Gallery.
The statue subsequently remained in store in Birmingham until 1992, when (thanks largely to the efforts of Mr. Charles Massey, a grateful patient of the hospital) it was returned on a permanent loan to Cheltenham General, so that it would be available to be put on permanent display again, as soon as a suitable location could be found. It proved possible to find a site at the entrance to the new Day and Endoscopy Units, which were formally opened in December 1994.
The statue was formally welcomed back to the Hospital by Mr. Clive Thompson JP, Chairman of the East Gloucestershire NHS Trust, on Tuesday 24th of January, 1995.
It is now, in the meantime, back in storage in the Museum Collection Centre, Birmingham.
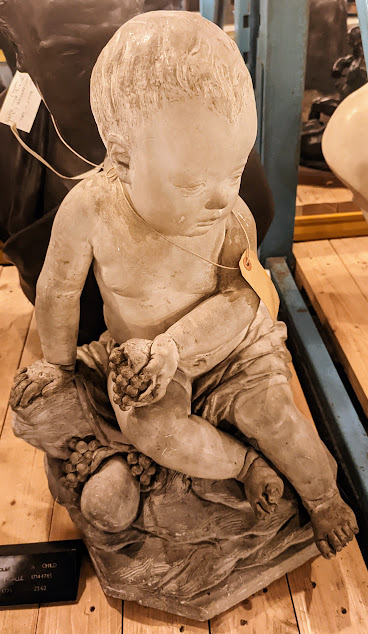
This plaster sculpture of Cheron as a child by Jean-Baptise Pigalle (1714 – 1785) is dated 1775.
Read about Pigalle here.
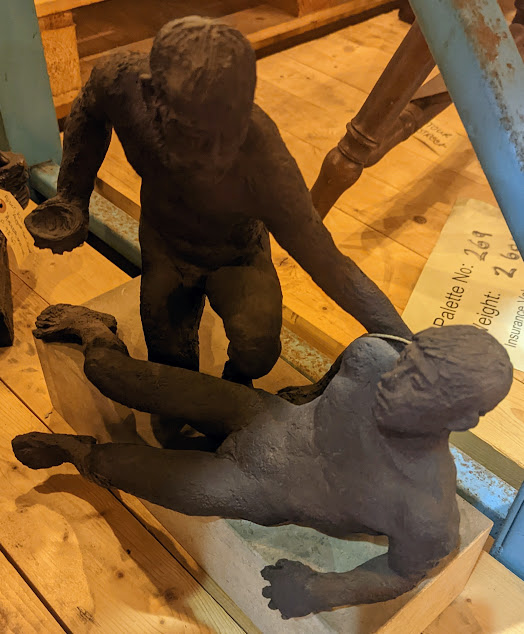
This sculpture was made by Uli Nimptsch (1897 – 1977). Marquette for a sculpture commissioned in 1963 and sited outside Selly Oak Hospital, Birmingham. The sculpture comprises two male nudes, one lying down and the other kneeling over him, holding a bowl, a pose suggesting the compassion of the title. Nimptsch was born in Berlin in 1897, the younger son of a Berlin Stock Broker. He studied sculpture at the Berlin Academy and spent time working in Rome, Paris and Germany, but left during the 2nd World War for Switzerland in order to protect his wife who was Jewish.
Read about Nimptsch here.
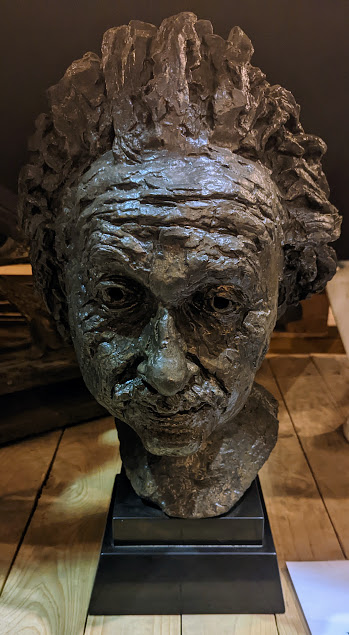
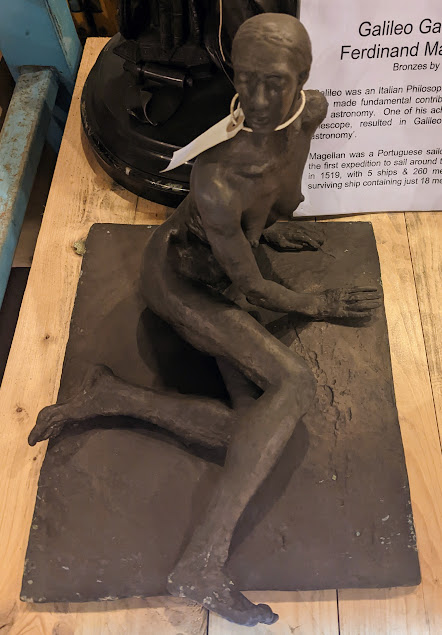
This sculpture was made by Sir Jacob Epstein (1880 – 1959). Epstein was born in New York and studied drawing while working in a bronze factory. In 1902 he went to the Ecole des Beaux-Arts and the Academie Julian in Paris, before settling in London in 1905. The sitter for this early bust in 1911 was Nan Condron, a gypsy and professional artist’s model, whom Epstein met at the Cafe Royal.
Read about Epstein here.
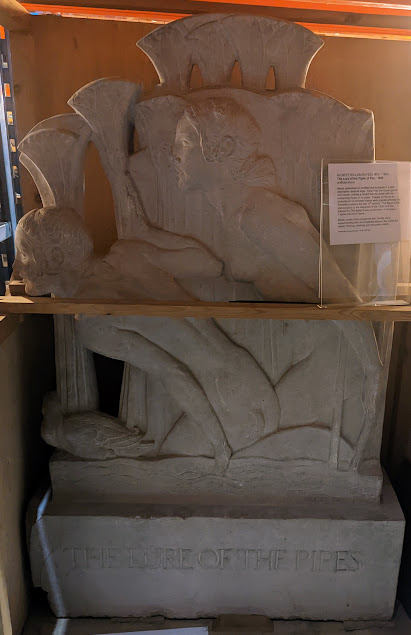
This sculpture made in 1932 by Gilbert William Bayes (1872 – 1953) is carved from reconstituted stone. Construction companies like Tarmac had been experimenting with this material since the 1920’s.
Read about Bayes here.
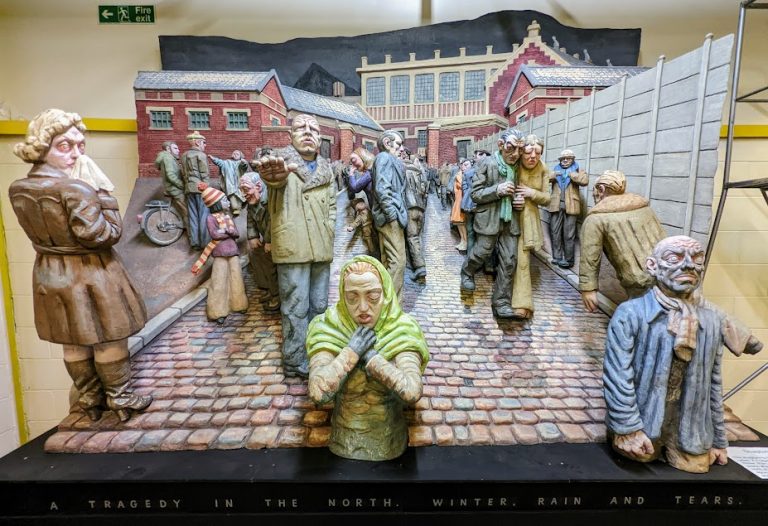
This sculpture by Raymond Mason depicts a scene after a mining disaster in the north of France. It is made from epoxy resin and painted with acrylic. He also designed the iconic Forward statue in Birmingham’s Centenary Square which was destroyed by a fire in 2003.
Read about Mason here.
Read about the mining disaster here.
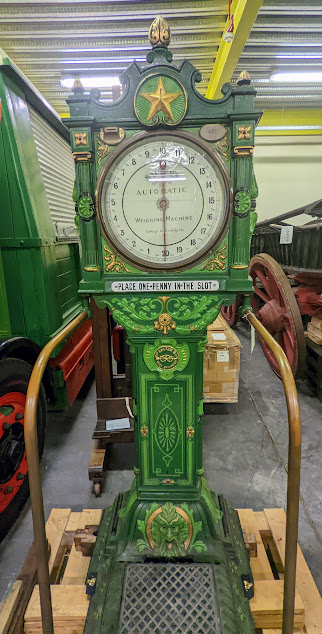
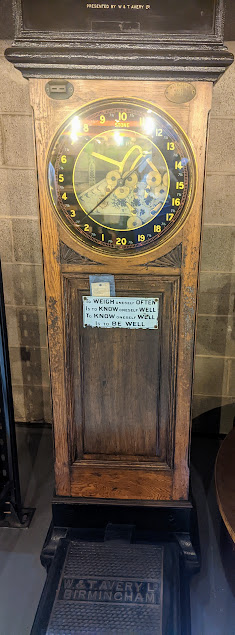
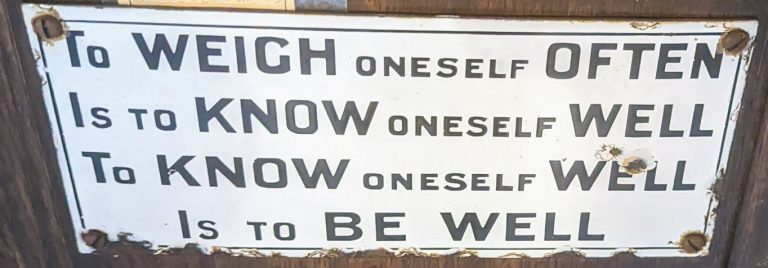
Weighing Machines
Local History: The Museum Collection Centre.
The Museum Collection: Photos – Page 1.
The Museum Collection: Photos – Page 3.
The Museum Collection: Photos – Page 4.
The Museum Collection: Photos – Page 5.
The Museum Collection: Photos – Page 6.
The Museum Collection: Photos – Page 7.
The Museum Collection: Photos – Page 8.
All the above images are copyright of Frank Parker.
Museum Collection Centre on Facebook.
Museum Collection Centre on Twitter.
Birmingham Museums Collection – Find out more about Birmingham’s collections including art and design, human history, natural science and science and industry categories. Each category contains sub-categories full of useful information and great photos.
Birmingham Museums Trust’s Digital Asset Resource – Official website. There is no registration or log-in required to use this website for out-of-copyright collection images Download free Public Domain image files up to 3mb in size with free Creative Commons licenses. You are entitled to unlimited downloads. Also download free Audio Files complete with a license. These can be downloaded for non-commercial use only and attribution is required.
BirminghamMAG – Official YouTube channel. Birmingham Museums and Art Gallery provide world-class museums at the cultural heart of Birmingham.
Birmingham Museums – Official website.
Thinktank: Birmingham Science Museum – Official website.
Birmingham Museum And Art Gallery – Official website.
Aston Hall – Official website.
Blakesley Hall – Official website.
Museum Of The Jewellery Quarter – Official website.
Sarehole Mill – Official website.
Soho House – Official website.
Weoly Castle – Official website.
Wikipedia – Official website. This is a free encyclopedia that anyone can edit.
Here are photos I took on my first visit to the Museum Collection Centre on 17/09/22.
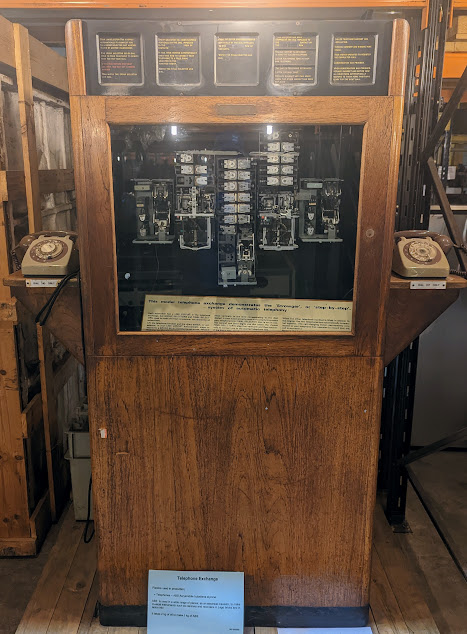


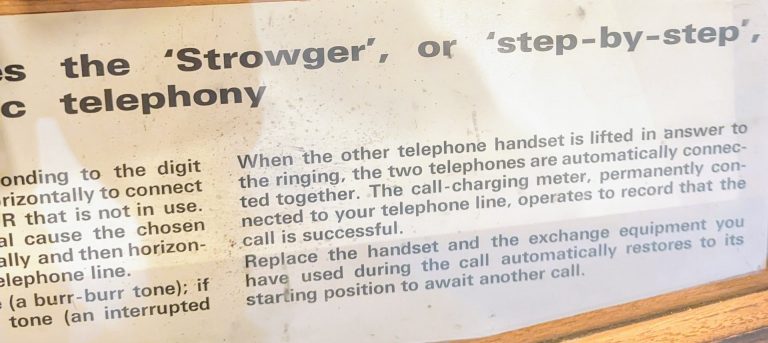
This model demonstrates the Stowger, or step-by-step, system of automatic telephony.
I used to love having a go on this model exchange system at the old Science Museum when I was younger in the 1970’s, going with my Mom and family, then on my own or with friends in the 1980’s and then with my kids when they were younger in the 1990’s. Good times.
Read more about the Stowger switch here.

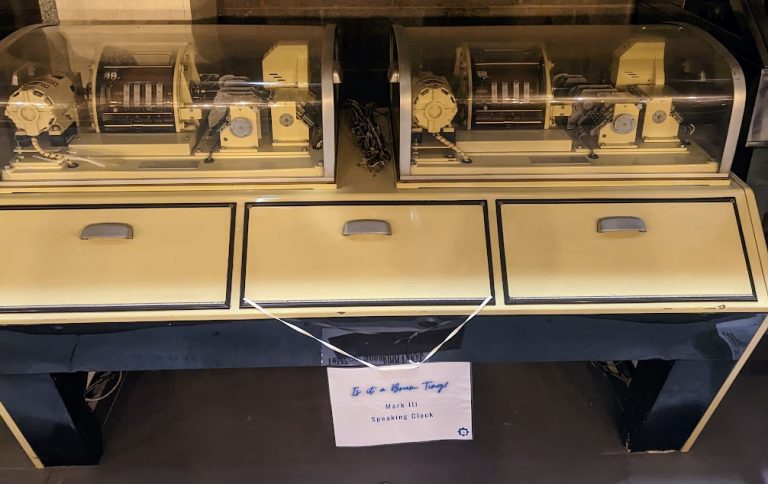
Part of the earliest version (1936) of the Post Office Speaking Clock. This MK I version used audio recordings of the time to send a message giving an accurate time check by telephone.
Read about the Speaking Clock here.


Read about the Speaking Clock here.
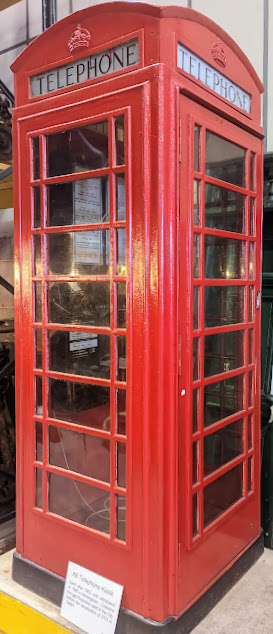
Used after 1952 until withdrawal in 1986 in Birmingham. It contains the last Payphone used in the City before the introduction of STD in 1986/7.
This reminds me of the one over the road from my old house in Hurst Lane, Shard End on the right-hand corner in the 70’s and 80’s. I remember at one time in the 80’s the coin box was broken and every time you put your money in (2p or 10p) it would come out and usually give you a bit more. It was like a free fruit machine courtesy of BT!
Read about the iconic red phone box here.
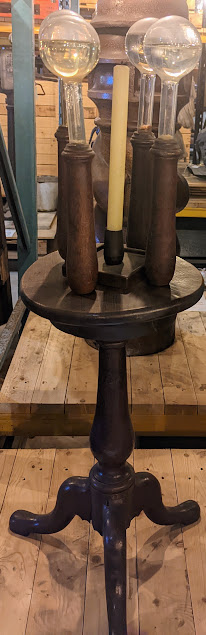


This is another thing I have fond memories of having a go on in the old Science Museum back in the day. Back then if a museum had a button to press you could bet your life I would press it. Nothing has changed now I am older, especially in a shop with toys etc. If it says press me or try me (or even if it doesn’t) then it has to be done!
Local History: The Museum Collection Centre.
The Museum Collection: Photos – Page 2.
The Museum Collection: Photos – Page 3.
The Museum Collection: Photos – Page 4.
The Museum Collection: Photos – Page 5.
The Museum Collection: Photos – Page 6.
The Museum Collection: Photos – Page 7.
The Museum Collection: Photos – Page 8.
All the above images are copyright of Frank Parker.
Museum Collection Centre on Facebook.
Museum Collection Centre on Twitter.
Birmingham Museums Collection – Find out more about Birmingham’s collections including art and design, human history, natural science and science and industry categories. Each category contains sub-categories full of useful information and great photos.
Birmingham Museums Trust’s Digital Asset Resource – Official website. There is no registration or log-in required to use this website for out-of-copyright collection images Download free Public Domain image files up to 3mb in size with free Creative Commons licenses. You are entitled to unlimited downloads. Also download free Audio Files complete with a license. These can be downloaded for non-commercial use only and attribution is required.
BirminghamMAG – Official YouTube channel. Birmingham Museums and Art Gallery provide world-class museums at the cultural heart of Birmingham.
Birmingham Museums – Official website.
Thinktank: Birmingham Science Museum – Official website.
Birmingham Museum And Art Gallery – Official website.
Aston Hall – Official website.
Blakesley Hall – Official website.
Museum Of The Jewellery Quarter – Official website.
Sarehole Mill – Official website.
Soho House – Official website.
Weoly Castle – Official website.
Wikipedia – Official website. This is a free encyclopedia that anyone can edit.
On Saturday 17th September 2022, I visited the Museum Collection Centre in Dollman Street, Nechells, Birmingham as part of Birmingham Heritage Week. I had been wanting to go there for a long time and I am glad I finally did for two reasons.
Firstly, this was the road where I used to live in the 1960’s, from when I was born in 1966, up until I left in 1970. Apart from a very brief return visit here with my Dad in a car when I was in my early days in secondary school (I think?), this was the first time I have been and walked up the whole of it on my own. It felt strange being here again because I can not recall any of it the first time around because I was a baby/toddler yet I felt at home.
Secondly, I knew I would see some things growing up from many visits to the Museum and Art Gallery and the old Science Museum. I wasn’t disappointed and they brought a smile to my face and good memories of going with my Mom and family when I was younger, to when I was a teenager going on my own or with friends and then with my kids when they were younger.
I didn’t take a photo of everything. I was going to but the place was bigger than I thought it would be, A LOT BIGGER. I only stayed on the bottom floor. I was given a map of the place but was too busy taking photos to realise there was another floor to explore. I am not sure if I saw everything on the ground floor, that is overwhelming this place was on my first visit.
As it was my phone ran out of battery anyway and I was only there for an hour and had to use my spare phone but I did manage to take over 200 photos!
I have edited them and sorted out the best ones to put in the gallery below. I couldn’t decide if they were to go in my West Midlands History or History category as they cover both so I decided they were worthy of their own album on this page.
I plan to go again for sure as there is a lot more I want to see that I missed out on the first time and have a better look at everything. If you are into West Midlands History and History like me then I HIGHLY RECOMMEND you visit the Museum Collection Centre in Birmingham, you won’t be sorry, I know I wasn’t.
Click here to see my photographic memories of my day out.
The Museum Collection Centre is the main store for Birmingham Museum Trust, holding over 80% of a collection of around a million items, many offering a real insight into life in Birmingham and the West Midlands over the centuries.
With only a small percentage of collections on display at Birmingham Museums, or on loan to other organisations, it is the only place to see collection items not normally on display.
A huge number of the objects are held on open storage in one very large warehouse which contains everything from aircraft engines to zoological specimens. Among the hundreds of thousands of objects stored here are steam engines, sculptures, cars, a giant spider crab, a retro chip fryer, and many more. Smaller objects, and objects that need more stable temperature and relative humidity, are stored in purpose-built spaces.
With its mix of fascinating finds and a behind-the-scenes atmosphere, this hidden gem is an intriguing place to explore. It is open to the public on designated open afternoons which take place every two weeks on a Friday. These open sessions last up to 1.5 hours and pre-booking is essential.
Visitors will only be admitted on scheduled open event afternoons and days.
Tickets for the Open Afternoons can be found on the What’s On page.

Museum Collection Centre
25 Dollman Street
Nechells
Birmingham
B7 4RQ.
Click here to see how to get there.
For accessibility when you get there click here.
Free car park.
Bicycle racks.
Toilets, including Disabled toilets.
Lifts to all floors.
The Museum Collection Centre is the main place of work for some of the staff who care for, research, or otherwise work with their collections, as well as the volunteers who support them in doing that. Their teams care for the collections in store (as well as those on display at our other sites) and work on improving the documentation of the collection.
They want to make sure your visit is as safe and enjoyable as possible so some safety measures will continue:
They support staff and visitors who wish to wear a face covering.
Staff who test positive for COVID-19 will isolate at home for at least 5 days until they have two successive negative tests.
There are hand sanitisers at the entrance and throughout the building.
Contactless card payments will limit personal interaction, but cash will also be accepted.
They have cleaners working throughout the day focusing on touch points and toilets to keep them safe and clean.
Please do not visit them if you are feeling unwell, have any symptoms of Covid-19 or have been in contact with anyone that has had the virus in the last 10 days. Please contact them if you have any further questions.
You can also visit their Open Day which runs as part of Birmingham Heritage Week each year, and includes activities for children, themed tours, and conservation demonstrations. The annual event will allow you to see a vast range of objects, often with a real focus on Birmingham and the West Midlands. The contrasting mix of objects and the behind-the-scenes atmosphere at the Museum Collection Centre make it an intriguing place to explore and discover more about museum stores.
The Open Day will also include a pop-up shop, meet the experts, curator tours, conservation demonstrations, family-friendly events, story telling, object handling and more.
Refreshments are available to purchase.
Pre-booking is essential. They expect high demand so please book early to avoid disappointment.
Your entry is timed so please arrive at your allotted time, late arrivals may not be able to enter.
Warm clothes are recommended and sensible footwear is essential for all.
Tickets for the next annual Open Day can be found on the What’s On page.
The Museums Collection Photos: Page 1.
The Museum Collection: Photos – Page 2.
The Museum Collection: Photos – Page 3.
The Museum Collection: Photos – Page 4.
The Museum Collection: Photos – Page 5.
The Museum Collection: Photos – Page 6.
The Museum Collection: Photos – Page 7.
The Museum Collection: Photos – Page 8.
The Museum Collection Centre entrance and exit image above is copyright of Chris Allen and was taken from Wikipedia. It comes with a Creative Commons licence.
All the above images are copyright of Frank Parker unless stated.
The Museum Collection Centre on Facebook.
The Museum Collection Centre on Twitter.
Birmingham Museums Collection – Find out more about Birmingham’s collections including art and design, human history, natural science and science and industry categories. Each category contains sub-categories full of useful information and great photos.
Birmingham Museums Trust’s Digital Asset Resource – Official website. There is no registration or log-in required to use this website for out-of-copyright collection images Download free Public Domain image files up to 3mb in size with free Creative Commons licenses. You are entitled to unlimited downloads. Also download free Audio Files complete with a license. These can be downloaded for non-commercial use only and attribution is required.
BirminghamMAG – Official YouTube channel. Birmingham Museums and Art Gallery provide world-class museums at the cultural heart of Birmingham.
Birmingham Museums – Official website.
Thinktank: Birmingham Science Museum – Official website.
Birmingham Museum And Art Gallery – Official website.
Aston Hall – Official website.
Blakesley Hall – Official website.
Museum Of The Jewellery Quarter – Official website.
Sarehole Mill – Official website.
Soho House – Official website.
Weoly Castle – Official website.

You can download this book and the thirteen other fantasy books in the Oz series by L. Frank Baum via Project Gutenberg by clicking on the link in Blog Posts below.
Glinda of Oz is the fourteenth Land of Oz book written by children’s author L. Frank Baum, published on July 10, 1920. It is the last book of the original Oz series, which was later continued by other authors. Like most of the Oz books, the plot features a journey through some of the remoter regions of Oz; though in this case the pattern is doubled: Dorothy and Ozma travel to stop a war between the Flatheads and Skeezers; then Glinda and a cohort of Dorothy’s friends set out to rescue them. The book was dedicated to Baum’s second son, Robert Stanton Baum.
The printed text of the book features one significant change from Baum’s manuscript. In the manuscript, Red Reera first appears as a skeleton, its bones wired together, with glowing red eyes in the sockets of its skull. The printed text makes Reera the Red first appear as a grey ape in an apron and lace cap — a comical sight rather than a frightening and disturbing spectre. The change was most likely made by Baum at the suggestion of his editors. Other changes in the manuscript, made by an unknown editor at Reilly & Lee, are relatively trivial and do not always improve the text.
The submerged city of the Skeezers in this book may have been suggested to Baum by the semi-submerged Temple of Isis at Philae in Egypt, which the Baums had seen on their trip to Europe and Egypt in the first six months of 1906.
SPOILER ALERT: Skip this bit if you haven’t read the book and are planning to do so!
Princess Ozma and Dorothy travel to an obscure corner of the Land of Oz, in order to prevent a war between two local powers, the Skeezers and the Flatheads. The leaders of the two tribes prove obstinate and are determined to fight in spite of Ozma and Dorothy. Unable to prevent the war, Dorothy and Ozma find themselves imprisoned on the Skeezers’ glass-covered island, which has been magically submerged to the bottom of its lake. Their situation worsens when the warlike queen Coo-ee-oh, who is holding them captive and who alone knows how to raise the island back to the surface of the lake, loses her battle and gets transformed into a swan, forgetting all her magic in the process, and leaving the inhabitants of the island, with Ozma and Dorothy, trapped at the bottom of the lake. Ozma and Dorothy summon Glinda, who, with help from several magicians and magical assistants, must find a way to raise the island to the surface of the lake again, and liberate its inhabitants.
Read more about Glinda Of Oz here.
The above articles were sourced from Wikipedia and are subject to change.
Books: The Oz Series By L. Frank Baum.
Books: The Wonderful Wizard Of Oz By L. Frank Baum.
Books: The Marvelous Land Of Oz By L. Frank Baum.
Books: Ozma Of Oz By L. Frank Baum.
Books: Dorothy And The Wizard In Oz By L. Frank Baum.
Books: The Road To Oz By L. Frank Baum.
Books: The Emerald City Of Oz By L. Frank Baum.
Books: The Patchwork Girl Of Oz By L. Frank Baum.
Books: Tik-Tok Of Oz By L. Frank Baum.
Books: The Scarecrow Of Oz By L. Frank Baum.
Books: Rinkitink In Oz By L. Frank Baum.
Books: The Lost Princess Of Oz By L. Frank Baum.
Books: The Tin Woodman Of Oz By L. Frank Baum.
Books: The Magic Of Oz By L. Frank Baum.
Books: Queer Visitors From The Marvelous Land Of Oz By L. Frank Baum.
Books: The Woggle-Bug Book By L. Frank Baum.
The image shown at the top of this page is in the Public Domain via Wikipedia.
Project Gutenberg – Project Gutenberg is an online library of free e-books and was the first provider of free electronic books. Michael Hart, the founder of Project Gutenberg, invented e-books in 1971 and his memory continues to inspire the creation of them and related content today.
The Wonderful Wiki of Oz – Official website. A wonderful and welcoming encyclopedia of all things Oz that anyone can edit or contribute Oz-related information and Oz facts to enjoy.
The Oz Archive on Facebook – Archiving and celebrating the legacy of Oz.
The Oz Archive on Twitter – Archiving and celebrating the legacy of Oz.
The Oz Archive on Instagram – Archiving and celebrating the legacy of Oz.
The Oz Archive on TikTok – Archiving and celebrating the legacy of Oz.
You can download this book and the thirteen other fantasy books in the Oz series by L. Frank Baum via Project Gutenberg by clicking here.
The Magic of Oz is the thirteenth Land of Oz book written by L. Frank Baum. Published on June 7, 1919, one month after the author’s death, The Magic of Oz relates the unsuccessful attempt of the Munchkin boy Kiki Aru and former Nome King Ruggedo to conquer Oz.
The novel was dedicated to “the Children of our Soldiers, the Americans and their Allies, with unmeasured Pride and Affection.”
The upsurge in sales that had greeted the previous Oz book, The Tin Woodman of Oz, in 1918 also affected The Magic of Oz, which sold 26,200 copies. The Oz books in total sold almost twice as many copies in 1919 as in 1918, and 1918 had been an exceptionally good year. The high sales were most likely influenced by the death of Baum earlier in 1919.
SPOILER ALERT: Skip this bit if you haven’t read the book and are planning to do so!
At the top of Mount Munch lives a group of people known as the Hyups. One of their numbers, a Munchkin named Bini Aru, discovered a method of transforming people and objects by merely saying the word “Pyrzqxgl”. After Princess Ozma decreed that no one could practise magic in Oz except for Glinda the Good Witch and the Wizard of Oz, Bini wrote down the directions for pronouncing “Pyrzqxgl” and hid them in his magical laboratory.
When Bini and his wife are at a fair one day, their son Kiki Aru, who thirsts for adventure, finds the directions and afterwards transforms himself into a hawk and visits various countries outside the land of Oz. When he alights in the land of Ev, Kiki Aru learns that he needs money to pay for a night’s lodging (versus Oz, where the money is not used at all) and changes himself into a magpie to steal a gold piece from an old man. A sparrow confronts the then-human Kiki Aru with knowledge of the theft, and Kiki says that he did not know what it was like to be wicked before, he is glad that he is now. This conversation is overheard by Ruggedo, the Nome who was exiled to the Earth’s surface in Tik-Tok of Oz, and he sees through Kiki Aru’s power a chance to get revenge on the people of Oz.
Kiki changes himself and Ruggedo into birds and they fly over the Deadly Desert into the Land of Oz. They enter Oz as animals to escape detection by Glinda and to recruit an army of conquest from the country’s wild animal population. When they first appear in the Forest of Gugu in the Gillikin Country, Kiki changes himself and Ruggedo into Li-Mon-Eags (fictional creatures with the heads of lions, the bodies of monkeys, and the wings of eagles as well as having the tails of donkeys) and lies that they’ve seen the people of the Emerald City plan to enslave the animal inhabitants of the Forest. Ruggedo claims that the Li-Mon-Eags will transform the animals into humans and march on the Emerald City and transform its inhabitants into animals, driving them into the forest. Ruggedo proves their power (for Kiki’s the only one who knows “Pyrzqxgl”) by having Kiki transform one of the leopard king Gugu’s advisors, Loo the unicorn, into a man and back again. Gugu offers to meet with the leaders of the other animal tribes to decide on this matter of invasion.
Dorothy and the Wizard arrive with the Cowardly Lion and the Hungry Tiger in the Forest of Gugu during this council of war with a request for monkeys to train in time for Ozma’s upcoming birthday party. Ruggedo recognizes his old enemies and inspires Kiki to begin transforming people and animals left and right — including Ruggedo, whom Kiki turns against by transforming him into a goose, a transformation that the Nome most fears because as a goose he might lay an egg. (In Baum’s universe, all eggs are a deadly poison to nomes.)
The Wizard, whom Kiki transformed into a fox, follows the Li-Mon-Eag with his magic bag, the transformed Kiki, deep into the forest where he begins transforming monkeys into giant human soldiers. However, Kiki makes them so big that they cannot move through the trees. The Wizard, however, heard how to correctly pronounce “Pyrzqxgl” and first stops Kiki and Ruggedo by transforming them into a walnut and a hickory nut. Then the Wizard resumes his rightful form and changes Dorothy, the Cowardly Lion, the Hungry Tiger, and Gugu back to their forms, and he agrees to change the soldiers back into monkeys. The Wizard recruits several of the grateful monkeys and shrinks them down to bring them back to the Emerald City and train.
On arriving there, Dorothy and the Wizard are dispatched to a magic island where Cap’n Bill and Trot went to get a magic flower for Ozma’s birthday. However, the island itself causes anything living that touches it to take root there, and that is how the sailor and his friend are found when Dorothy and the Wizard arrive. The Wizard uses “Pyrzqxgl” to change Cap’n Bill and Trot into honeybees which narrowly avoid being eaten by the Cowardly Lion and the Hungry Tiger. When they are human again, Cap’n Bill retrieves the flower by strapping a wood plank onto his good leg, walks with that and his wooden leg onto the island, and retrieves the flower.
Back at the Emerald City, Ozma and her friends celebrate her birthday (though without quite the pomp and fanfare from The Road to Oz) and then decide how to deal with the evil magicians transformed into nuts. The Wizard uses “Pyrzqxgl” to change them back to Kiki Aru and Ruggedo and make them thirsty enough to drink the Water of Oblivion, which will make them forget all that they have ever known. The now-blank slate Kiki Aru and Ruggedo will live in the Emerald City and learn to be good and kind.
Read more about The Magic Of Oz here.
The above articles were sourced from Wikipedia and are subject to change.
Books: The Oz Series By L. Frank Baum.
Books: The Wonderful Wizard Of Oz By L. Frank Baum.
Books: The Marvelous Land Of Oz By L. Frank Baum.
Books: Ozma Of Oz By L. Frank Baum.
Books: Dorothy And The Wizard In Oz By L. Frank Baum.
Books: The Road To Oz By L. Frank Baum.
Books: The Emerald City Of Oz By L. Frank Baum.
Books: The Patchwork Girl Of Oz By L. Frank Baum.
Books: Tik-Tok Of Oz By L. Frank Baum.
Books: The Scarecrow Of Oz By L. Frank Baum.
Books: Rinkitink In Oz By L. Frank Baum.
Books: The Lost Princess Of Oz By L. Frank Baum.
Books: The Tin Woodman Of Oz By L. Frank Baum.
Books: Glinda Of Oz By L. Frank Baum.
Books: Queer Visitors From The Marvelous Land Of Oz By L. Frank Baum.
Books: The Woggle-Bug Book By L. Frank Baum.
The 1919 first edition front cover image shown at the top of this page is © John R. Neill and is in the Public Domain via Wikipedia.
Project Gutenberg – Project Gutenberg is an online library of free e-books and was the first provider of free electronic books. Michael Hart, the founder of Project Gutenberg, invented e-books in 1971 and his memory continues to inspire the creation of them and related content today.
The Wonderful Wiki of Oz – Official website. A wonderful and welcoming encyclopedia of all things Oz that anyone can edit or contribute Oz-related information and Oz facts to enjoy.
The Oz Archive on Facebook – Archiving and celebrating the legacy of Oz.
The Oz Archive on Twitter – Archiving and celebrating the legacy of Oz.
The Oz Archive on Instagram – Archiving and celebrating the legacy of Oz.
The Oz Archive on TikTok – Archiving and celebrating the legacy of Oz.
You can download this book and the thirteen other fantasy books in the Oz series by L. Frank Baum via Project Gutenberg by clicking here.
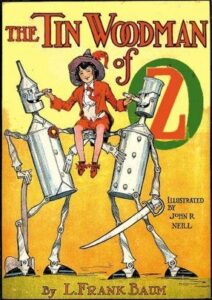
The Tin Woodman of Oz is the twelfth Land of Oz book written by L. Frank Baum and was originally published on May 13, 1918. The Tin Woodman is reunited with his Munchkin sweetheart Nimmie Amee from the days when he was flesh and blood. This was a back-story from Baum’s 1900 novel, The Wonderful Wizard of Oz.
The book was dedicated to the author’s grandson Frank Alden Baum.
The Tin Woodman of Oz provides the backstory for Oz itself; it was not always a fairyland and became one by being enchanted by the Fairy Queen Lurline, who left a fairy behind to rule it. In Glinda of Oz Ozma says that she herself was that fairy, though in The Marvelous Land of Oz we are told of her restoration to a throne long held by her ancestors.
In any event, this novel marks a clear maturation of Ozma’s character, now said to appear significantly older than Dorothy (in Ozma of Oz they appeared the same age) and a fairy working her own innate magic.
Baum’s Oz books had entered a trend of declining sales after 1910. The Tin Woodman of Oz reversed this trend; its first-year sales of 18,600 were enough to make it a bestselling success. Significantly, the sales of earlier Oz titles also rebounded from previous declines, many selling 3000 copies that year, and two, The Marvelous Land of Oz (1904) and the previous year’s The Lost Princess of Oz (1917), selling 4000 copies. Baum earned $6,742.52 from his Oz books that year. In 1918 the average annual salary of a clerical worker was $940. Even Baum’s non-Oz-related early works were affected by the upsurge: John Dough and the Cherub (1906) sold 1,562 copies in 1918.
The reason for this reversal of fortune is harder to specify. The psychological shock of the trench-warfare carnage of World War I may have inspired a wave of nostalgia for a simpler time, with Baum’s books representing a lost age of innocence.
A new edition of the book was illustrated by Dale Ulrey in 1955. She illustrated a new edition of The Wizard of Oz for Reilly & Lee the following year, but sales did not warrant her continuing to provide new illustrations.
SPOILER ALERT: Skip this bit if you haven’t read the book and are planning to do so!
The Tin Woodman and the Scarecrow are regaling each other with tales at the Woodman’s palace in the Winkie Country when a Gillikin boy named Woot wanders in. After he is fed and rested, Woot asks the Woodman how he came to be made of tin.
He relates how the Wicked Witch of the East enchanted his axe and caused him to chop his body parts off limb by limb because he was in love with her ward, Nimmie Amee. Each chopped limb was replaced by the tinsmith Ku-Klip with a counterpart made of tin. (Since Oz is a fairyland, no one can die, even when the parts of their body are separated from each other unless those people are witches and someone drops a house onto them. ) Without a heart, the Tin Woodman felt he could no longer love Nimmie Amee and he left her. Dorothy and the Scarecrow found him after he had rusted in the forest (an event-related in The Wonderful Wizard of Oz) and went with him to the Emerald City where the Wizard gave him a heart. Woot suggests that the heart may have made him kind, but it did not make him loving, or he would have returned to Nimmie Amee. This shames the Tin Woodman and inspires him to journey to the Munchkin Country and find her.
The Tin Woodman, the Scarecrow, and Woot journey into the Gillikin Country and encounter the inflatable Loons of Loonville, whom they escape by popping several of them. They descend into Yoop Valley, where the giantess Mrs. Yoop dwells, who transforms the travellers into animals for her amusement, just as she has already done to Polychrome, the Rainbow’s Daughter. Woot steals a magic apron that opens doors and barriers at the wearer’s request, enabling the four to escape. Woot, as a green monkey, narrowly avoids becoming a jaguar’s meal by descending further into a den of subterranean dragons. After escaping that ordeal, Woot, the Tin Woodman as a tin owl, the Scarecrow as a straw-stuffed bear, and Polychrome as a canary turn south into the Munchkin Country.
They arrive at the farm of Jinjur, who renews her acquaintance with them and sends them to the Emerald City for help. Dorothy and Ozma arrive and Ozma easily restores the Scarecrow and the Tin Woodman to their rightful forms. Polychrome takes several steps to restore to her true form. However, Ozma discovers that the Green Monkey into which Woot is transformed has to be someone’s form; it cannot be destroyed. Polychrome suggests as a punishment for wickedness that Mrs. Yoop the giantess be made into the Green Monkey, and Ozma thus succeeds in restoring Woot to his proper form.
The Tin Woodman, the Scarecrow, Woot, and Polychrome resume their quest and come upon the spot where the Tin Woodman had rusted and find another tin man there. After they oil his joints, he identifies himself as Captain Fyter, a soldier who courted Nimmie Amee after the Woodman had left her. The Wicked Witch of the East had made Fyter’s sword do what the Woodman’s axe had done—cut off his limbs, which Ku-Klip replaced with tin limbs. He does not have a heart either, but this does not bother him. However, he can rust, which he does one day during a rainstorm. Both woodmen now seek the heart of Nimmie Amee, agreeing to let her choose between them.
The five come to the dwelling of the tinsmith Ku-Klip where the Tin Woodman talks to himself—that is, to the head of the man (Nick Chopper) he once was. The Tin Woodman and the Tin Soldier also find a barrel of assorted body parts that once belonged to each of them, but some, like Captain Fyter’s head, are conspicuously missing. Ku-Klip reveals that he used Fyter’s head and many body parts from each of them (which never decayed) to create his assistant Chopfyt. Chopfyt complained about missing an arm until Ku-Klip made him a tin one, and he departed for the east.
The companions leave Ku-Klip and continue east themselves to find Nimmie Amee and find themselves crossing the Invisible Country, where a massive Hip-po-gy-raf helps them across in return for the Scarecrow’s straw. Reluctantly, he gives it and consents to being stuffed with available hay, which makes his movements awkward. They rest for the night at the house of Professor and Mrs. Swynne, pigs whose nine children live in the Emerald City under the care of the Wizard.
They leave the Swynnes and arrive at the foot of Mount Munch on the eastern border of the Munchkin Country. At its summit is a cottage where a rabbit tells them Nimmie Amee now lives happily. The Tin Woodman and Tin Soldier knock and are admitted by Nimmie Amee, who is now married to Chopfyt. She refuses to leave her domestic life, even to become Empress of the Winkies (which she would become as the Tin Woodman’s wife), saying “All I ask is to be left alone and not be disturbed by visitors.” The four return to the Emerald City and relate their adventures. Woot is allowed free rein to roam where he pleases, Captain Fyter is dispatched by Ozma to guard duty in the Gillikin Country, and the Tin Woodman and Scarecrow return to his palace in the Winkie Country where the story began.
Read more about The Tin Woodman Of Oz here.
The above articles were sourced from Wikipedia and are subject to change.
Books: The Oz Series By L. Frank Baum.
Books: The Wonderful Wizard Of Oz By L. Frank Baum.
Books: The Marvelous Land Of Oz By L. Frank Baum.
Books: Ozma Of Oz By L. Frank Baum.
Books: Dorothy And The Wizard In Oz By L. Frank Baum.
Books: The Road To Oz By L. Frank Baum.
Books: The Emerald City Of Oz By L. Frank Baum.
Books: The Patchwork Girl Of Oz By L. Frank Baum.
Books: Tik-Tok Of Oz By L. Frank Baum.
Books: The Scarecrow Of Oz By L. Frank Baum.
Books: Rinkitink In Oz By L. Frank Baum.
Books: The Lost Princess Of Oz By L. Frank Baum.
Books: The Magic Of Oz By L. Frank Baum.
Books: Glinda Of Oz By L. Frank Baum.
Books: Queer Visitors From The Marvelous Land Of Oz By L. Frank Baum.
Books: The Woggle-Bug Book By L. Frank Baum.
The 1918 first edition front cover image shown at the top of this page is © John R. Neill and is in the Public Domain via Wikipedia.
Project Gutenberg – Project Gutenberg is an online library of free e-books and was the first provider of free electronic books. Michael Hart, the founder of Project Gutenberg, invented e-books in 1971 and his memory continues to inspire the creation of them and related content today.
The Wonderful Wiki of Oz – Official website. A wonderful and welcoming encyclopedia of all things Oz that anyone can edit or contribute Oz-related information and Oz facts to enjoy.
The Oz Archive on Facebook – Archiving and celebrating the legacy of Oz.
The Oz Archive on Twitter – Archiving and celebrating the legacy of Oz.
The Oz Archive on Instagram – Archiving and celebrating the legacy of Oz.
The Oz Archive on TikTok – Archiving and celebrating the legacy of Oz.

You can download this book and the thirteen other fantasy books in the Oz series by L. Frank Baum via Project Gutenberg by clicking here.
The Lost Princess of Oz is the eleventh canonical Oz book written by L. Frank Baum. Published on June 5, 1917, it begins with the disappearance of Princess Ozma, the ruler of Oz and covers Dorothy and the Wizard’s efforts to find her. The introduction to the book states that its inspiration was a letter a young girl had written to Baum: “I suppose if Ozma ever got hurt or losted [sic], everybody would be sorry.”
The book was dedicated to the author’s newborn granddaughter Ozma Baum, child of his youngest son Kenneth Gage Baum.
Ruth Plumly Thompson borrowed the plot of this novel for her 1937 Oz book Handy Mandy in Oz. The Frogman and Cayke’s dishpan re-appear in Jeff Freedman’s 1994 novel The Magic Dishpan of Oz.
SPOILER ALERT: Skip this bit if you haven’t read the book and are planning to do so!
Dorothy has risen from bed for the day and is seeing to her friends in the Emerald City and notices that Ozma has not awakened yet. Dorothy goes into Ozma’s chambers only to find she is not there.
Glinda awakens in her palace in the Quadling Country and finds her Great Book of Records is missing. She goes to prepare a magic spell to find it- only to see her magic tools are gone as well. She dispatches a messenger to the Emerald City to relay news of the theft. Receiving the news, the Wizard hastily offers his magic tools to assist Glinda, however, these are missing as well. Glinda, Dorothy, and the Wizard organize search parties to find Ozma and the missing magic. Accompanying them are Button-Bright, Trot, and Betsy Bobbin. Dorothy and the Wizard’s party begins to search the Winkie Country to the west of the Emerald City.
Meanwhile, in the southwestern corner of the Winkie Country on a plateau belonging to the Yips, and Cayke the cookie cook has had her diamond-studded gold dishpan stolen. The self-proclaimed adviser to the Yips, a human-sized dandy of a frog called the Frogman, hears Cayke’s story and offers to help her find the dishpan. When they have gotten down the mountain, Cayke reveals to the Frogman that the dishpan has magic powers, for her cookies come out perfect every time.
Dorothy, the Wizard, and their party enter the previously unknown communities of Thi and Herku. The citizens of Thi are ruled by the High Coco-Lorum (really the King, but the people do not know it) and repeat the same story about the Herkus: they keep giants for their slaves. In the Great Orchard between Thi and Herku, the party enjoys a variety of fruits. Button-Bright eats from the one peach tree in the orchard. When he reaches the peach’s centre he discovers it to be made of gold. He pockets the gold peach pit to show Dorothy, Betsy, and Trot later – despite warnings from the local animals that the evil Ugu the Shoemaker has enchanted it.
In the city of Herku, Dorothy and the Wizard’s party are greeted by the emaciated but jovial Czarover of Herku, who has invented a pure energy compound called zosozo that can make his people strong enough to keep giants as slaves. The Czarover offers them six doses to use in their travels and casually reveals that Ugu the Shoemaker came from Herku. Ugu found magic books in his attic one day because he was descended from the greatest enchanter ever known and learned over time to do a great many magical things. The Shoemaker has since moved from Herku and built a castle high in the mountains. This clue leads Dorothy and the Wizard to think that Ugu might be behind all the recent thefts of magic and the ruler of Oz. They proceed from Herku toward the castle and meet with the Frogman, Cayke the Cookie Cook, and the Lavender Bear the stuffed bear who rules Bear Center. Lavender Bear carries the Little Pink Bear, a small wind-up toy that can answer any question about the past put to it.
When the combined party arrives at Ugu’s castle, Button-Bright is separated from them and falls into a pit. Before they rescue him, the Wizard asks the Little Pink Bear where Ozma is and it says that she is in the pit, too. After Button-Bright is let out of the pit, the Little Pink Bear says that she is there among the party. Unsure what to make of this seeming contradiction, the party advances toward the castle. Sure enough, Ugu is the culprit and the castle’s magical defences are techniques from Glinda and the Wizard. Upon overcoming these, the party finds themselves standing before the thief himself.
Ugu uses magic to send the room spinning and retreats. Dorothy stops it by making a wish with the magic belt. She uses its power to turn Ugu into a dove, but he modifies the enchantment so he retains human size and aggressive nature. Fighting his way past Dorothy and her companions, Ugu the dove uses Cayke’s diamond-studded dishpan to flee to the Quadling Country.
Once the magic tools are recovered, the conquering search party turns their attention to finding Ozma. The Little Pink Bear reveals that Ozma is being carried in Button-Bright’s jacket pocket, where he placed the gold peach pit. The Wizard opens it with a knife, and Ozma is released from where Ugu had imprisoned her. She was kidnapped by Ugu when she came upon him stealing her and the Wizard’s magic instruments.
The people of the Emerald City and Ozma’s friends all celebrate her return. Days later, the transformed Ugu flies in to see Dorothy and ask her forgiveness for what he did. She offers it and offers to change him back with the Magic Belt, but Ugu has decided that he likes being a dove much better.
Read more about The Lost Princess Of Oz here.
The above articles were sourced from Wikipedia and are subject to change.
Books: The Oz Series By L. Frank Baum.
Books: The Wonderful Wizard Of Oz By L. Frank Baum.
Books: The Marvelous Land Of Oz By L. Frank Baum.
Books: Ozma Of Oz By L. Frank Baum.
Books: Dorothy And The Wizard In Oz By L. Frank Baum.
Books: The Road To Oz By L. Frank Baum.
Books: The Emerald City Of Oz By L. Frank Baum.
Books: The Patchwork Girl Of Oz By L. Frank Baum.
Books: Tik-Tok Of Oz By L. Frank Baum.
Books: The Scarecrow Of Oz By L. Frank Baum.
Books: Rinkitink In Oz By L. Frank Baum.
Books: The Tin Woodman Of Oz By L. Frank Baum.
Books: The Magic Of Oz By L. Frank Baum.
Books: Glinda Of Oz By L. Frank Baum.
Books: Queer Visitors From The Marvelous Land Of Oz By L. Frank Baum.
Books: The Woggle-Bug Book By L. Frank Baum.
The 1917 first edition front cover image shown at the top of this page is © John R. Neill and is in the Public Domain via Wikipedia.
Project Gutenberg – Project Gutenberg is an online library of free e-books and was the first provider of free electronic books. Michael Hart, the founder of Project Gutenberg, invented e-books in 1971 and his memory continues to inspire the creation of them and related content today.
The Wonderful Wiki of Oz – Official website. A wonderful and welcoming encyclopedia of all things Oz that anyone can edit or contribute Oz-related information and Oz facts to enjoy.
The Oz Archive on Facebook – Archiving and celebrating the legacy of Oz.
The Oz Archive on Twitter – Archiving and celebrating the legacy of Oz.
The Oz Archive on Instagram – Archiving and celebrating the legacy of Oz.
The Oz Archive on TikTok – Archiving and celebrating the legacy of Oz.

You can download this book and the thirteen other fantasy books in the Oz series by L. Frank Baum via Project Gutenberg by clicking here.
Rinkitink in Oz is the tenth book in the Land of Oz series written by L. Frank Baum. It was published on June 20, 1916, with full-colour and black-and-white illustrations by artist John R. Neill. It is notable that most of the action takes place outside of Oz, and no character from Oz appears in the book until its climax; this is due to Baum’s having originally written most of the book as a fantasy novel unrelated to his Oz books over ten years earlier, in 1905.
The book was dedicated to the author’s newborn grandson Robert Alison Baum, the first child of the author’s second son Robert Stanton Baum.
In 1939, Rinkitink in Oz was one of six Oz books specially reissued by Rand McNally in a condensed, small-format junior edition for young readers, as a promotion for the MGM film of The Wizard of Oz.
SPOILER ALERT: Skip this bit if you haven’t read the book and are planning to do so!
Prince Inga is the son of King Kitticut and Queen Garee, who rules the island kingdom of Pingaree. Kitticut tells Inga that years earlier when armies from the neighbouring islands of Regos and Coregos attempted to invade and conquer Pingaree, they were repelled by Kitticut himself with the aid of three magic pearls. The blue pearl gives its bearer superhuman strength, the pink pearl protects him from any harm, and the white pearl speaks words of wisdom.
The jovial fat King Rinkitink of Gilgad arrives in Pingaree on royal holiday and remains as Kitticut’s guest for several weeks. Rinkitink usually rides Bilbil, a surly talking goat. One day invaders from Regos and Coregos arrive again and seize King Kitticut before he can reach his magic pearls. All the people are carried into slavery, except Inga and Rinkitink who escape along with Bilbil. Inga resolves to free his people with the aid of the magic pearls. Keeping the pearls secret from Rinkitink, he hides them in his shoes and the three sail to Regos.
The wicked King Gos of Regos and his army are easily defeated by the strength and invulnerability of Inga, and they flee to the neighbouring island of Coregos, ruled by the equally wicked Queen Cor. Inga and Rinkitink sleep in the palace, but the next morning both shoes along with the pink and blue pearls they contain are accidentally lost. The shoes are found by a poor charcoal-burner, who takes them home to give to his daughter Zella. Queen Cor arrives on Regos and captures the now powerless Inga and Rinkitink, and brings them back to Coregos.
Zella, wearing the shoes but unaware of the power they convey, travels to the palace on Coregos to sell honey to Queen Cor. Inga sees her and, recognizing her shoes, trades shoes with her. Again possessing the pearls, he overpowers Cor who escapes and flees to Regos. Inga frees the enslaved people of Pingaree, who sail back home. However, his parents are still captives of Gos and Cor, who take them to the neighbouring country of the subterranean Nomes and pay the Nome King Kaliko to use his magic to keep them captive.
Inga, Rinkitink and Bilbil arrive in the Nome Kingdom. For safety, Rinkitink carries the pink pearl which confers invulnerability. The Nome King refuses to release Inga’s parents because of his promise to Cor and Gos, although he claims to bear no animosity toward the travellers. Rinkitink and Inga sleep in the Nome King’s palace that night, but in the morning Kaliko attempts to kill both of them by various devious traps. Both escape by means of the power of the pearls they carry.
In Oz, Dorothy learns of these events and travels to the Nome Kingdom with the Wizard of Oz to confront Kaliko. She forces him to release Inga’s parents. Reunited with Inga, they all travel to Oz. The Wizard discovers that Bilbil is actually Prince Bobo of Boboland who has been turned into a goat by a cruel magician. He and Glinda are able to restore him to human form, which also cures his disagreeable disposition.
Inga, his parents, Rinkitink, and Bobo return to the rebuilt island of Pingaree. Soon afterwards, a boat arrives from Gilgad to take Rinkitink back home. Rinkitink objects that he does not want to return to his royal duties, but eventually is persuaded to return, accompanied by his friend Prince Bobo.
Read more about Rinkitink In Oz here.
The above articles were sourced from Wikipedia and are subject to change.
Books: The Oz Series By L. Frank Baum.
Books: The Wonderful Wizard Of Oz By L. Frank Baum.
Books: The Marvelous Land Of Oz By L. Frank Baum.
Books: Ozma Of Oz By L. Frank Baum.
Books: Dorothy And The Wizard In Oz By L. Frank Baum.
Books: The Road To Oz By L. Frank Baum.
Books: The Emerald City Of Oz By L. Frank Baum.
Books: The Patchwork Girl Of Oz By L. Frank Baum.
Books: Tik-Tok Of Oz By L. Frank Baum.
Books: The Scarecrow Of Oz By L. Frank Baum.
Books: The Lost Princess Of Oz By L. Frank Baum.
Books: The Tin Woodman Of Oz By L. Frank Baum.
Books: The Magic Of Oz By L. Frank Baum.
Books: Glinda Of Oz By L. Frank Baum.
Books: Queer Visitors From The Marvelous Land Of Oz By L. Frank Baum.
Books: The Woggle-Bug Book By L. Frank Baum.
The 1916 first edition front cover image shown at the top of this page is © John R. Neill and is in the Public Domain via Wikipedia.
Project Gutenberg – Project Gutenberg is an online library of free e-books and was the first provider of free electronic books. Michael Hart, the founder of Project Gutenberg, invented e-books in 1971 and his memory continues to inspire the creation of them and related content today.
The Wonderful Wiki of Oz – Official website. A wonderful and welcoming encyclopedia of all things Oz that anyone can edit or contribute Oz-related information and Oz facts to enjoy.
The Oz Archive on Facebook – Archiving and celebrating the legacy of Oz.
The Oz Archive on Twitter – Archiving and celebrating the legacy of Oz.
The Oz Archive on Instagram – Archiving and celebrating the legacy of Oz.
The Oz Archive on TikTok – Archiving and celebrating the legacy of Oz.
You can download this book and the thirteen other fantasy books in the Oz series by L. Frank Baum via Project Gutenberg by clicking here.
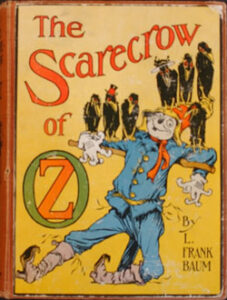
The Scarecrow of Oz is the ninth book set in the Land of Oz written by L. Frank Baum. Published on July 16, 1915, it was Baum’s personal favourite of the Oz books and tells of Cap’n Bill and Trot journeying to Oz and, with the help of the Scarecrow, overthrowing the cruel King Krewl of Jinxland. Cap’n Bill and Trot (Mayre Griffiths) had previously appeared in two other novels by Baum, The Sea Fairies and Sky Island.
The novel is dedicated to The Uplifters of Los Angeles. The Lofty and Exalted Order of Uplifters, a select subgroup of the elite Los Angeles Athletic Club, was a social and fraternal organization of prominent southern California businessmen and public figures. Baum had been active in the group since he first moved to Los Angeles in 1909 and served among the Excelsiors, the group’s governing board. He also wrote and acted in their shows and he played the bass drum in their band.
A small group of Uplifters were the key investors in The Oz Film Manufacturing Company, organized to make movies of Baum books and stories. The investors put up $100,000; Baum was named president and received a block of stock in the company in payment for the cinema rights to his works. The company’s first project was a film of The Patchwork Girl of Oz; and its second project, released in October 1914, was His Majesty, the Scarecrow of Oz, produced at a cost of $23,500, and with a cast (according to the not-always factually reliable Baum) of 130.
Baum hoped that the movie would be a success, and provide a big publicity boost to the Scarecrow novel to follow in 1915. Things did not quite work out as the optimistic author hoped; the film did not earn enough to cover its costs. The first edition of the novel sold around 14,300 copies, only a couple hundred more than its predecessor, Tik-Tok of Oz—though in the long run, The Scarecrow of Oz would be one of the more popular instalments in the Oz series.
Like Tik-Tok, Scarecrow contains a significant romantic element—the Rose Princess and Private Files in the former, and Gloria and Pon in the latter—that was not typical of the earlier Oz books. Perhaps this was a factor in the books’ limited reception. In adapting his children’s stories for stage and film versions, Baum had to compromise between appealing to children and to adults. His films suffered with audiences because of this conflict in audience expectation. Perhaps this confusion affected the sales of the books as well, to some degree.
Although the journey of an American child to Oz had long been a favourite plot for Baum, this work represented its last appearance: no more children would be inducted into Oz for the duration of his work on the series
The Ork, voiced by Peter MacNicol, appeared in an episode of The Oz Kids.
SPOILER ALERT: Skip this bit if you haven’t read the book and are planning to do so!
Cap’n Bill, a sailor with a wooden peg-leg, and his friend, a little girl named Trot, set out from California on a calm day for a short ride in their rowboat. A freak whirlpool capsizes their boat and pulls them underwater, where they are carried by mermaids (referred to but not seen) to a cave. They are soon joined by a flying creature called an Ork. Passing through a dark tunnel out of the cave, the three arrive at an island inhabited by a grim man calling himself Pessim the Observer. Cap’n Bill and Trot reduce their size by eating magic shrinking-berries, and the Ork carries them away from the island to the land of Mo, where they eat another type of magic berries and resume their normal size.
They meet the Bumpy Man, who specializes in serving sugar and molasses and has some of their appearance too. After dining on Mo rain (lemonade) and Mo snow (popcorn), they run into Button-Bright, the boy from The Road to Oz who has gotten lost again. Cap’n Bill calls down some of the native birds (who, like all birds in fairy countries, can talk back) and offers them the growing berries to make them large enough to carry himself, Trot, and Button-Bright to the land of Oz. When they make it across the desert, Button-Bright, Cap’n Bill, and Trot are set down in a field and the Ork leaves them to find his own country, which he got lost from on a routine flight.
The place Button-Bright, Cap’n Bill, and Trot have arrived in, Jinxland, is cut off from the rest of Oz by a range of high mountains and a bottomless crevice. The kingdom has had a turbulent recent history. The rightful king of Jinxland, King Kynd, was removed by his prime minister Phearse, who was in turn removed by his prime minister Krewl who now rules over the land. An unpleasant but wealthy citizen named Googly-Goo seeks to marry King Kynd’s daughter, Princess Gloria; however, she is in love with Pon, the current gardener’s boy, who is the son of the first usurper Phearse. King Krewl and Googly-Goo hire a witch named Blinkie to freeze Gloria’s heart so that she will no longer love Pon. Cap’n Bill happens on this plot, and to keep him from interfering, Blinkie turns him into a grasshopper. She then freezes Gloria’s heart. Googly-Goo proposes to her, but now that her heart is frozen, she does not love anyone at all, including Googly-Goo, whose proposal she scornfully declines.
The Scarecrow is at Glinda’s palace in the Quadling Country and learns about these events from reading Glinda’s Great Book of Records, a magical volume that transcribes every event in the world at the instant it happens. The Scarecrow wants to help Cap’n Bill, Button-Bright, and Trot, and Glinda sends him to Jinxland with some of her magic to aid him. The Scarecrow travels to Jinxland and joins forces with Trot, Cap’n Bill (who is still a grasshopper), and the Ork, who flies off to his homeland for reinforcements. The Scarecrow attempts to depose Krewl and is captured, with Googly-Goo suggesting the Scarecrow be burned, but then the Ork arrives just in time with fifty other Orks, who attack the Jinxlanders and turn the tables on Krewl. The victorious party then arrives at Blinkie’s and makes her undo her magic on Cap’n Bill and Princess Gloria by using a magic powder to shrink her in size. When she has undone her evil spells, the Scarecrow stops Blinkie’s shrinking, but she remains at a small size and loses all her magic powers.
Gloria takes the throne of Jinxland and elevates Pon to be her royal consort, and the Scarecrow, Button-Bright, Cap’n Bill, Trot, and the Orks return to the Emerald City for a celebration.
Read more about The The Scarecrow Of Oz here.
The above articles were sourced from Wikipedia and are subject to change.
Books: The Oz Series By L. Frank Baum.
Books: The Wonderful Wizard Of Oz By L. Frank Baum.
Books: The Marvelous Land Of Oz By L. Frank Baum.
Books: Ozma Of Oz By L. Frank Baum.
Books: Dorothy And The Wizard In Oz By L. Frank Baum.
Books: The Road To Oz By L. Frank Baum.
Books: The Emerald City Of Oz By L. Frank Baum.
Books: The Patchwork Girl Of Oz By L. Frank Baum.
Books: Tik-Tok Of Oz By L. Frank Baum.
Books: Rinkitink In Oz By L. Frank Baum.
Books: The Lost Princess Of Oz By L. Frank Baum.
Books: The Tin Woodman Of Oz By L. Frank Baum.
Books: The Magic Of Oz By L. Frank Baum.
Books: Glinda Of Oz By L. Frank Baum.
Books: Queer Visitors From The Marvelous Land Of Oz By L. Frank Baum.
Books: The Woggle-Bug Book By L. Frank Baum.
The 1915 first edition front cover image shown at the top of this page is © John R. Neill and is in the Public Domain via Wikipedia.
Project Gutenberg – Project Gutenberg is an online library of free e-books and was the first provider of free electronic books. Michael Hart, the founder of Project Gutenberg, invented e-books in 1971 and his memory continues to inspire the creation of them and related content today.
The Wonderful Wiki of Oz – Official website. A wonderful and welcoming encyclopedia of all things Oz that anyone can edit or contribute Oz-related information and Oz facts to enjoy.
The Oz Archive on Facebook – Archiving and celebrating the legacy of Oz.
The Oz Archive on Twitter – Archiving and celebrating the legacy of Oz.
The Oz Archive on Instagram – Archiving and celebrating the legacy of Oz.
The Oz Archive on TikTok – Archiving and celebrating the legacy of Oz.
You can download this book and the thirteen other fantasy books in the Oz series by L. Frank Baum via Project Gutenberg by clicking here.
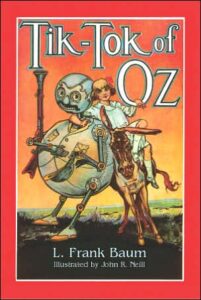
Tik-Tok of Oz is the eighth Land of Oz book written by L. Frank Baum, published on June 19, 1914. The book has little to do with Tik-Tok and is primarily the quest of the Shaggy Man (introduced in The Road to Oz) to rescue his brother and his resulting conflict with the Nome King.
The endpapers of the first edition held maps: one of Oz itself, and one of the continents on which Oz and its neighbouring countries belonged. These were the first maps printed of Oz.
In 1913, Baum’s long-delayed and heavily-adapted stage version of Ozma of Oz, re-titled The Tik-Tok Man of Oz, was produced in Los Angeles, with moderate success. The music was composed by Louis F. Gottschalk, Baum’s favourite composer, who would also be the dedicatee of the Tik-Tok novel a year later. Baum adapted some of the material from the stage production for the novel. As in Ozma of Oz, a shipwreck precipitates the heroine into her adventure, and the quest of the Shaggy Man for his brother, who was named Wiggy in the play, is another attempt to rescue a prisoner of the Nome King. The picking of Ozga is a motif found in Dorothy and the Wizard in Oz.
The book has several continuity errors with earlier books in the series, particularly The Road to Oz. Whereas Polychrome met the Shaggy Man in that book, this point is neglected by Baum in Tik-Tok. Also, whereas the Shaggy Man merely needs to carry the Love Magnet on his person for it to work in The Road to Oz, in this book it is necessary for him to remove it from his pocket and physically show it to those he wishes to love him.
Tik-Tok of Oz was more modestly produced than earlier Oz books, with twelve colour plates instead of sixteen. Its first edition sold a little over 14,000 copies — a respectable figure, but 3,000 fewer than The Patchwork Girl of Oz had done the year before. Baum’s books were facing stiff new competition — from his own earlier books. The reprint house M. A. Donohue & Co. had purchased the rights to several early Baum works from Bobbs-Merrill, and was marketing cut-rate editions. People were less willing to pay the usual $1.25 for a new Oz book when the original Wizard of Oz was selling for $0.35.
Tik-Tok of Oz also contained the first map of Oz and its neighbouring countries, which proved to be a very popular feature. Unfortunately for the principle of consistency, this initial map of Oz was drawn backwards, with the Munchkin Country in the left and the Winkie Country in the right, with the compass rose reversed to keep the Munchkin Country in the east and the Winkie Country in the west. Subsequent maps from the publisher corrected the compass rose, but not the locations. This may explain why Ruth Plumly Thompson reversed the locations from Baum’s — in her books the Munchkin country is west; and her Winkies East (see for instance Ozoplaning with the Wizard of Oz but also in several other books). James E. Haff and Dick Martin ultimately corrected these in new maps designed for The International Wizard of Oz Club. A squarish map that largely follows Haff and Martin appears in The Dictionary of Imaginary Places. The presence of a Davy Jones Island on this map indicates that the inclusion of the character Davy Jones, a wooden whale, as a decoration on the map, was misinterpreted by the book’s recartographers, as no such place appears in any Oz books up to that book’s publication.
The 1993 novel Queen Ann in Oz is a sequel to Tik-Tok of Oz.
SPOILER ALERT: Skip this bit if you haven’t read the book and are planning to do so!
Queen Ann Soforth of Oogaboo, a small monarchy separated from the rest of Oz’s Winkie Country, sets out to raise an army to conquer Oz. Seventeen men eventually make up the Army of Oogaboo (sixteen officers and one private); they march out of their valley. Glinda the Good, protector of Oz, magically rearranges the path through the mountains and Queen Ann and her army march out of Oz into a low-lying, befogged country.
Betsy Bobbin, a girl who is a year older than Dorothy Gale, and her loyal mule Hank have washed ashore during a storm. They arrive at a large greenhouse that is the domain of the Rose Kingdom, where the roses tell them that no strangers are allowed. Just as the Royal Gardener (apparently the only human allowed in this flowery kingdom) is about to pass a sentence on Betsy and Hank, the Shaggy Man falls through the greenhouse’s roof, and charms the Gardener into sparing all of their lives with his Love Magnet. The flowers, not having hearts, are unaffected by the Magnet, and force the travellers to leave, taking with them the newly plucked Rose Princess Ozga, a cousin of Ozma, the ruler of Oz.
The Shaggy Man relates how Ozma sent him here via the Magic Belt because he wanted to find his brother, who went digging underground in Colorado and disappeared. He surmised that the Nome King, ruler of the underground Nome Kingdom, captured him. They meet up with Polychrome the Rainbow’s Daughter, and they rescue Tik-Tok from the well where the Nome King had tossed him. Once Tik-Tok is wound up, he accompanies Betsy, Hank, the Shaggy Man, Ozga, and Polychrome to their chance encounter with Queen Ann and her army. In a rage, Queen Ann orders them to be seized and bound, but Private Files — the only private in this army of generals, colonels, and majors — refuses to bind innocent girls. He resigns his commission on the spot. When Queen Ann learns of the riches to be found in the Nome King’s underground kingdom, she calms down and accepts the services of Tik-Tok as her new private.
The Nome King (who has recovered from having drunk the Water of Oblivion in The Emerald City of Oz) is aghast at this group coming toward his underground kingdom. Since no one can be killed in Oz, the Nome King seeks to discourage them, first by taking them through the Rubber Country, and then disposing of them by dropping them through the Hollow Tube, a conduit leading to the other side of the world.
There the party enters the jurisdiction of the immortal called Tittiti-Hoochoo, the Great Jinjin, who vows to punish the Nome King for using the Hollow Tube. He sends Tik-Tok and the others back with his Instrument of Vengeance, a lackadaisical dragon named Quox. Quox and his riders bound from the other end of the Tube into an army of Nomes and narrowly evade them. Queen Ann and the Army of Oogaboo fall into the Slimy Cave when they enter the Nome Kingdom; the Shaggy Man and his companions are captured by the Nome King. Ann and her army escape the cave while the Nome King amuses himself by transforming his captives into various objects. Quox arrives, bursting through the main cavern. The Nome King sees the ribbon around Quox’s neck and forgets all the magic he ever knew. The Nome King is driven out of his kingdom when Quox releases six eggs from the padlock around his neck. The eggs, poisonous to Nomes, follow the Nome King to the Earth’s surface and confine him there.
The new Nome King, the former chief steward Kaliko, vows to help the Shaggy Man find his brother, whom he knows is in the Metal Forest. The Shaggy Man meets his brother in the centre of the Forest, but the brother was cursed with a charm of ugliness by the former Nome King. A kiss will break a charm. First Betsy, a mortal maid, tries to undo the spell, then Ozga, a mortal maid who was once a fairy. Finally, it’s the fairy Polychrome’s kiss that restores the Shaggy Man’s brother to his former self.
There is a banquet of rejoicing in the Nome Kingdom, and the former Nome King earnestly pleads to be let back into the underground lair (“No Nome can really be happy except underground”), which Kaliko allows on condition that he behave himself. Once on the surface again, Polychrome ascends her rainbow and Ozma uses the magic belt to bring Tik-Tok back to Oz and send Queen Ann, the Army of Oogaboo, Files, and Ozga back to Oogaboo. The Shaggy Man only agrees to return when his brother, Betsy, and Hank are allowed to enter Oz too.
Upon being welcomed in Oz, Hank, the Cowardly Lion, the Hungry Tiger, and the Saw-Horse debate who is the best mistress — Betsy (for Hank), Dorothy (for both the Lion and the Tiger), or Ozma (for the Saw-Horse). The three girls are listening and laugh at a silly quarrel, which the animals realize is silly too. In addition, Dorothy finally gets to hear her dog Toto speak — for all animals can in the Land of Oz. Finally, Betsy decides to stay in Oz forever.
Read more about The Tik-Tok Of Oz here.
The above articles were sourced from Wikipedia and are subject to change.
Books: The Oz Series By L. Frank Baum.
Books: The Wonderful Wizard Of Oz By L. Frank Baum.
Books: The Marvelous Land Of Oz By L. Frank Baum.
Books: Ozma Of Oz By L. Frank Baum.
Books: Dorothy And The Wizard In Oz By L. Frank Baum.
Books: The Road To Oz By L. Frank Baum.
Books: The Emerald City Of Oz By L. Frank Baum.
Books: The Patchwork Girl Of Oz By L. Frank Baum.
Books: The Scarecrow Of Oz By L. Frank Baum.
Books: Rinkitink In Oz By L. Frank Baum.
Books: The Lost Princess Of Oz By L. Frank Baum.
Books: The Tin Woodman Of Oz By L. Frank Baum.
Books: The Magic Of Oz By L. Frank Baum.
Books: Glinda Of Oz By L. Frank Baum.
Books: Queer Visitors From The Marvelous Land Of Oz By L. Frank Baum.
Books: The Woggle-Bug Book By L. Frank Baum.
The 1914 first edition front cover image shown at the top of this page is © John R. Neill and is in the Public Domain via Wikipedia.
Project Gutenberg – Project Gutenberg is an online library of free e-books and was the first provider of free electronic books. Michael Hart, the founder of Project Gutenberg, invented e-books in 1971 and his memory continues to inspire the creation of them and related content today.
The Wonderful Wiki of Oz – Official website. A wonderful and welcoming encyclopedia of all things Oz that anyone can edit or contribute Oz-related information and Oz facts to enjoy.
The Oz Archive on Facebook – Archiving and celebrating the legacy of Oz.
The Oz Archive on Twitter – Archiving and celebrating the legacy of Oz.
The Oz Archive on Instagram – Archiving and celebrating the legacy of Oz.
The Oz Archive on TikTok – Archiving and celebrating the legacy of Oz.